
The xsvtoys Home Theater - INTRODUCTION
UPDATE 2023 - This page will soon be updated, almost everything has been replaced!
There are many variations on the so-called "Home Theater". These can be very elaborate rooms that virtually replicate a real movie theater or they could be a simple TV connected to a few components and some speakers. There really is no right or wrong way to make a home theater. Whatever works for you for your enjoyment and stays within your budget is the system that is perfect for you! Here you will see the xsvtoys home theater described. It is not too fancy, and consists of a fairly typical set of components, some old, and some new.

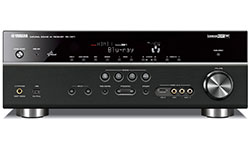
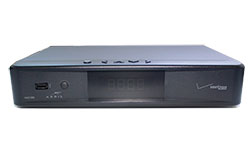
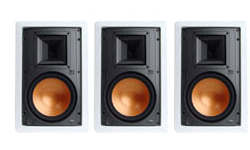
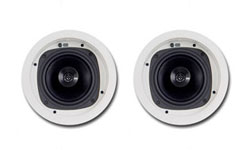
Equipment List


Home Theater Wiring Diagram (click it to see the big 1600 pixel wide version in a new window)

LibreOffice Draw Audio Video Jacks and Plugs File
I used to use Microsoft Visio for creating the home theater wiring diagrams, but now I have switched to LibreOffice Draw. This is an open source and free program and while it doesn't have all of the power of Visio I have found that it works just fine for creating wiring diagrams such as the one above. Unfortunately there isn't an easy way to build the equivalent of a Visio stencil file, but you can download the native ODG file and open it in LibreOffice Draw and then copy the parts you need to your own drawing. These files are offered totally free and with very minor restrictions. If you find it is helpful for a project that you publish, please give credit back to here as outlined in this website's terms and conditions. Otherwise, enjoy, and if you have any suggestions for improving this file please send them on to me. If you can learn to use Draw, you should be able to use these icons to create a very nice-looking wiring diagram for your home theater or other audio visual setups; certainly much better than the examples that are found floating on the internet.
The jacks and plugs are all vector images created using Inkscape.
Just click the image below and you should be able to download the LibreOffice Draw file (ODG file). If you would like to click the original ODG file used to make the home theater wiring diagram above click here: xsvtoys_home_theater_2018-02.odg

Visio Audio Video Jacks and Plugs Stencil
I am still offering my Visio Audio-Video Jacks and Plugs stencil file for your use, totally free and with very minor restrictions. If you find it is helpful for a project that you publish, please give credit back to here as outlined in this website's terms and conditions. Otherwise, enjoy, and if you have any suggestions for improving this stencil please send them on to me. If you are handy with Visio, you should be able to use these stencils to create a very nice-looking wiring diagram for your home theater or other audio visual setups; certainly much better than the examples that are found floating on the internet.
The jacks and plugs were created using Adobe Flash software then imported into Microsoft Visio and converted to a stencil.
Just click the image below and you should be able to download the Visio 2013 stencil (VSSX file). If you have an older version of Visio, try this version: jacks-plugs.vss
